· Astrophotography · 5 min read
Astrophotography Rig
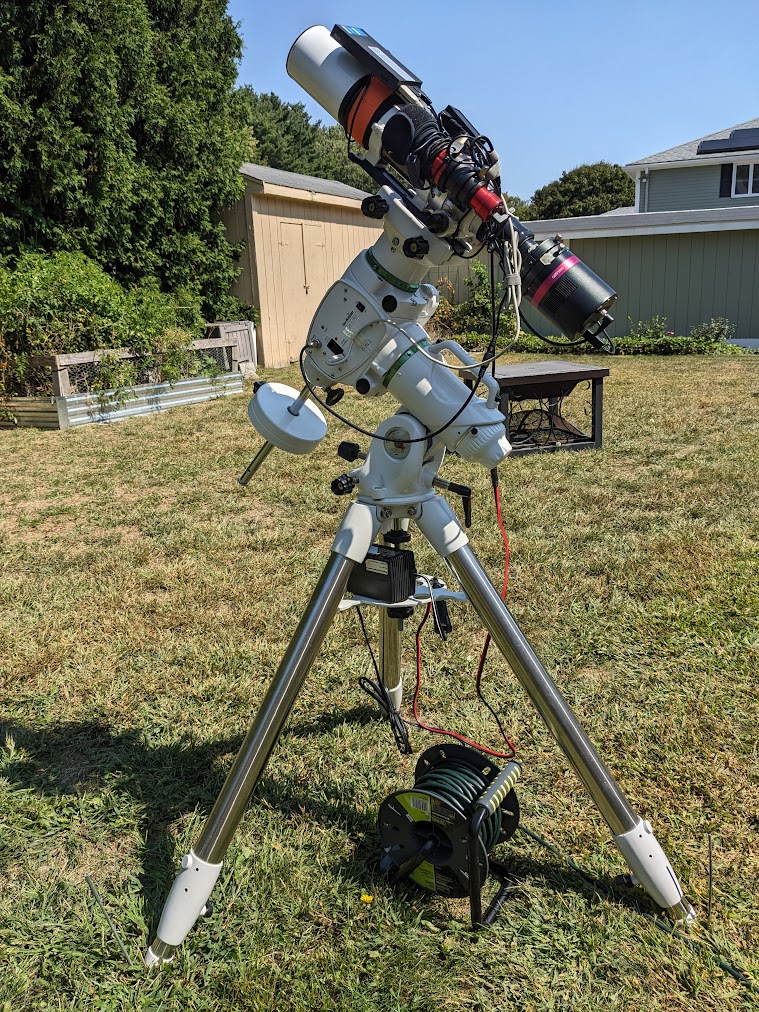
Astrophotography rigs come in all shapes and sizes. Here’s the one I use along with some of the images I have captured over the past couple years.
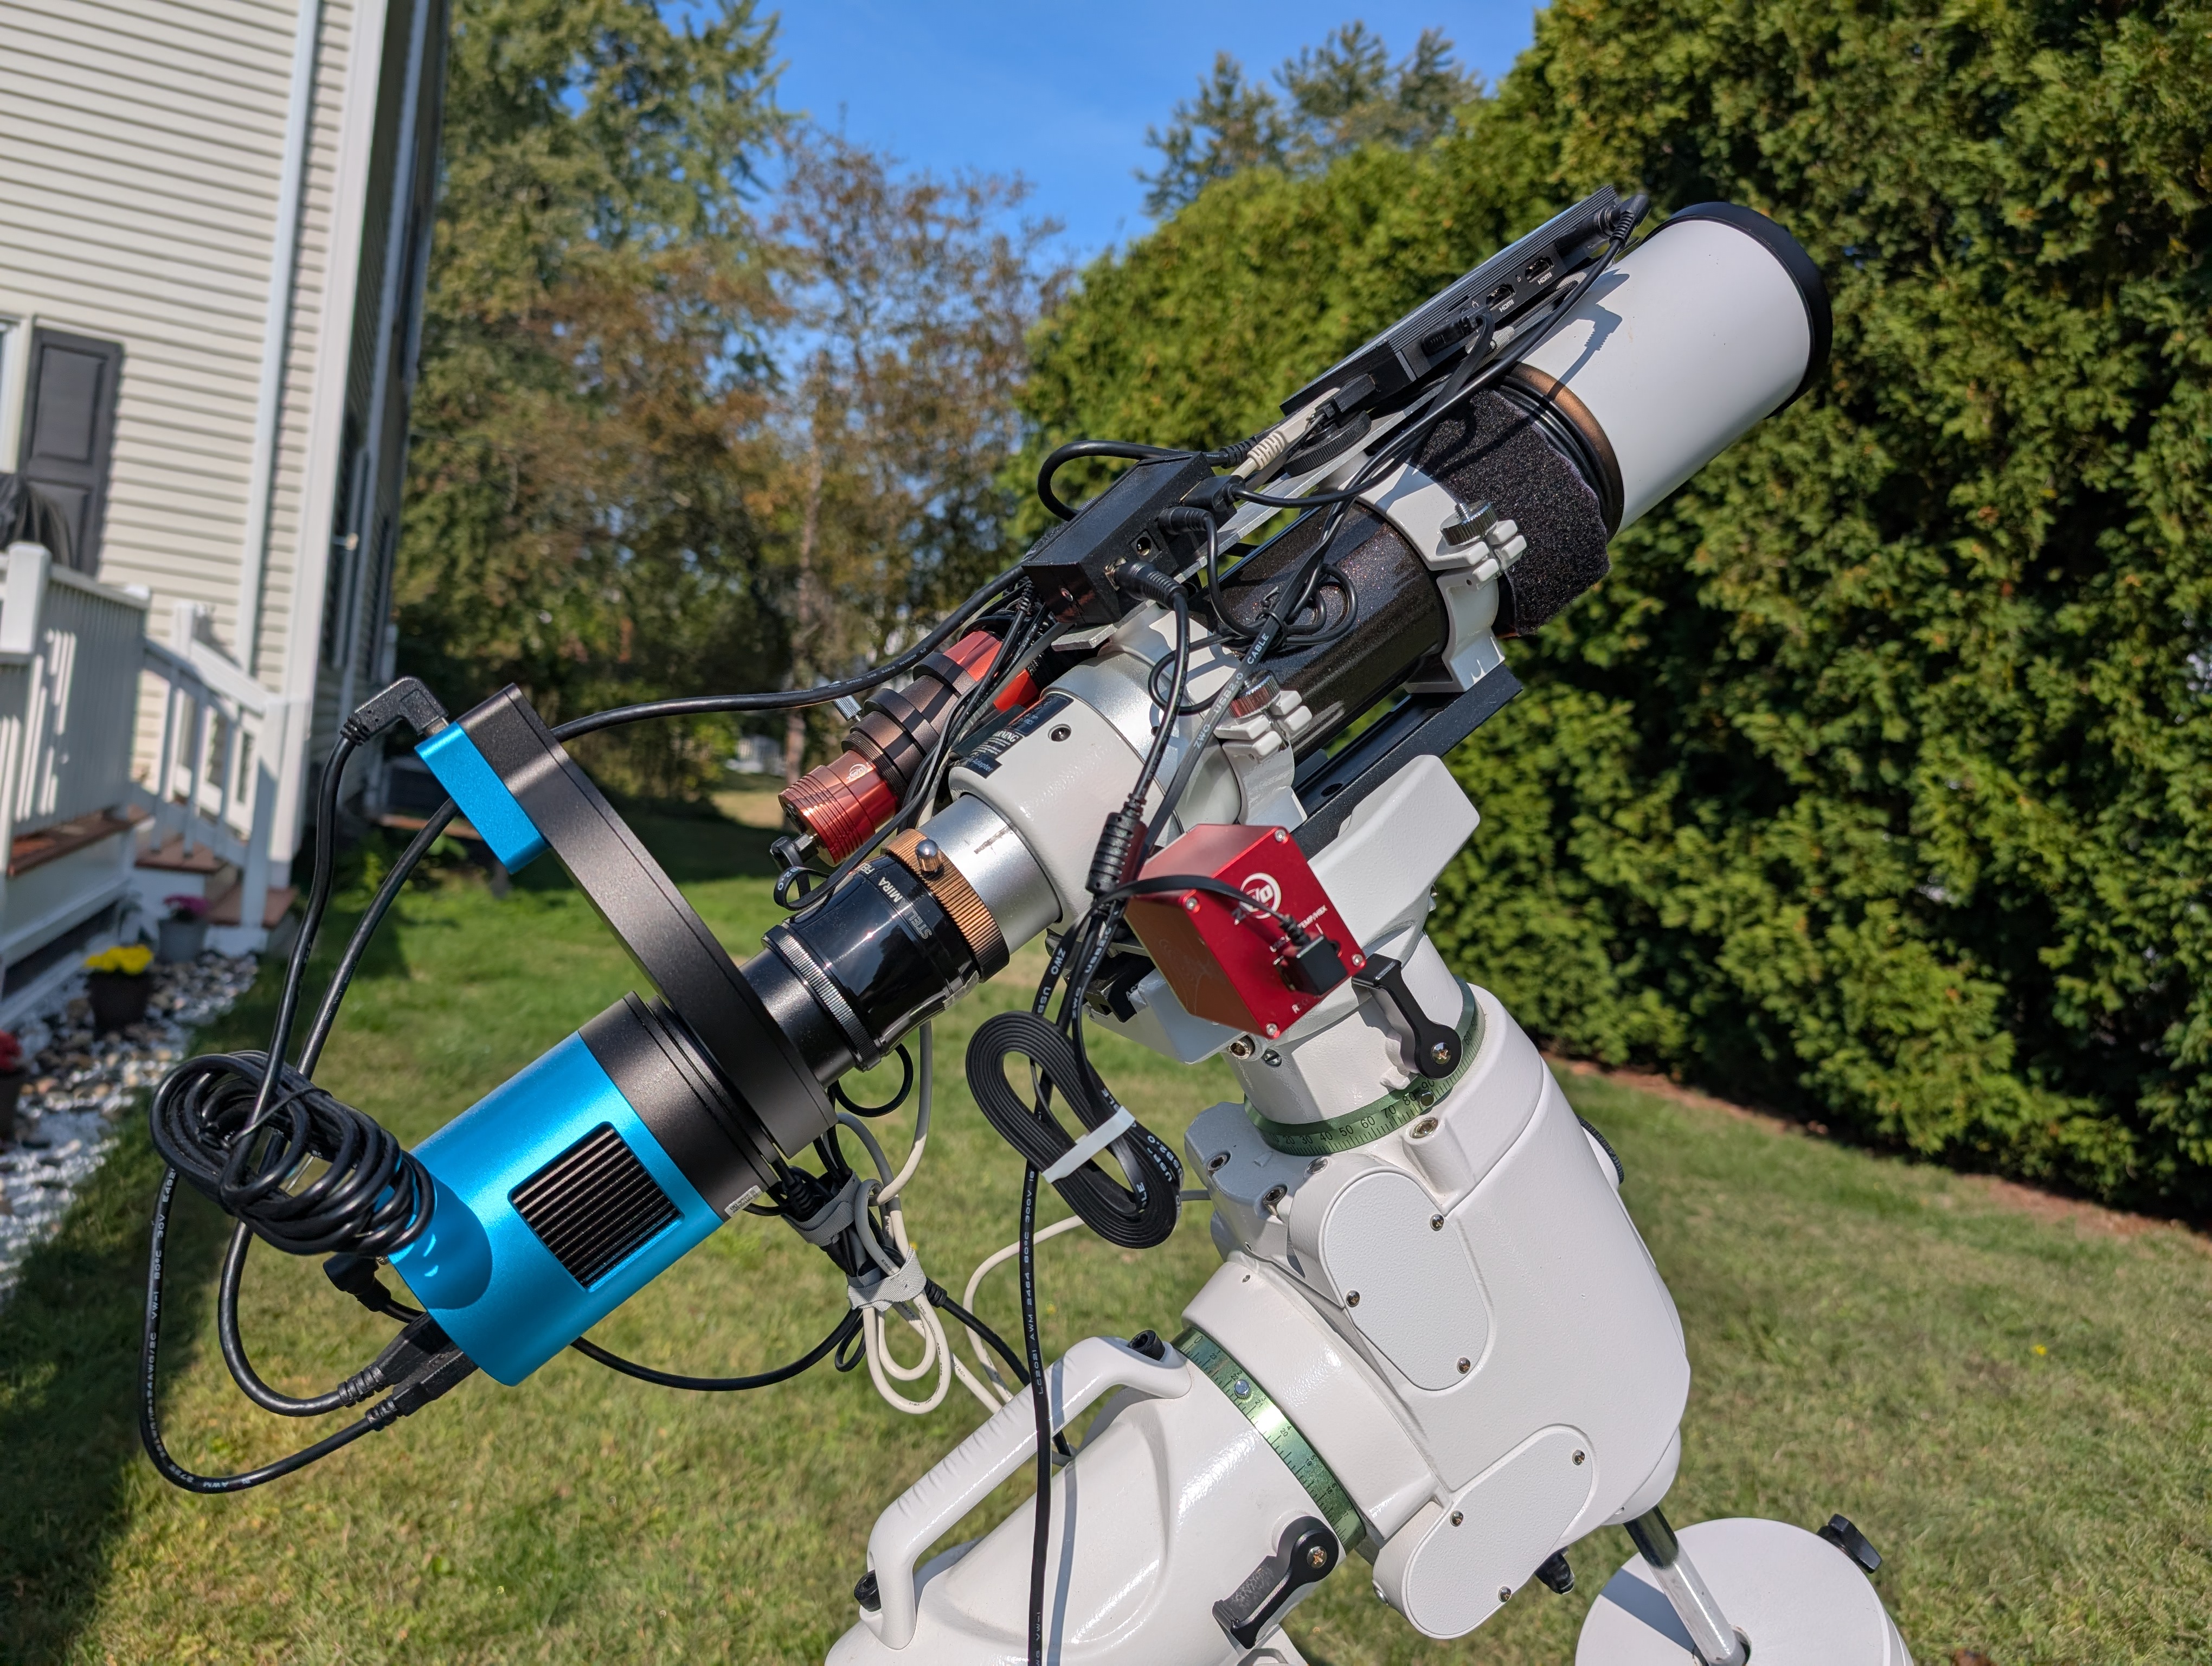
This is the magical pile of cables, electronics, and optics
The Basic Rig
The basic components needed for astrophotography are:
- Mount - the platform for the whole operation. This role can be played by a simple tripod, a motorized star tracker, or a fully computerized mount.
- Telescope or Lens - this provides magnification for imaging. The magnification is measured in focal length. More focal length = more magnification. The focal ratio describes the light gathering capabilities - lower means more light is collected.
- Camera - ranges from webcams, to DSLRs, to dedicated astro cameras with cooling capabilities
My rig:
- Mount: SkyWatcher EQ6-R Pro - this is a motorized equatorial mount. Using either the included hand controller or a computer, this mount can automatically move to a set location in the sky and then match the rotation speed of the sky to make the stars appear stationary for imaging. This mount is heavy, powerful, and accurate - it can comfortably carry a much larger and heavier telescope than I currently have on it.
- Telescope: SkyWatcher EvoStar 72ED - this is a relatively inexpensive refactor telescope with a focal length of 420mm. Refractor telescopes use lenses to provide magnification, while reflector telescopes use mirrors.
- Camera: QHY168C - this is a cooled astro camera with same sensor size as cropped DSLRs. Stock DSLRs have internal filters that block most of the red emissions from hydrogen gas in nebulas, while astro cameras (and DSLRs that have been modified) do not have this filter. Between this sensitivity to red emissions and a built-in cooler to control the temperature, astro cameras are a great tool for the job.
Extras
While astrophotography is possible with a simple tripod, camera, and lens, there are a lot of tools to greatly simplify the process.
- Field Flattener - this optical device helps flatten out the image from the telescope.
- Dew straps - I have a USB-powered strap with heating elements on both my guide scope and main scope. These straps warm the scope to ensure dew doesn’t collect when it is humid out.
- ZWO Electronic Autofocuser (EAF) - this device consists of a stepper motor and a coupler that connects it to the focuser on the telescope. Once connected, the computer can change the focus by instructing the stepper motor to move to certain positions. When combined with the camera and software on the computer, the rig is able to automatically focus based on the size of the stars detected. This means no more manual focusing to start the session and the rig is able to re-focus when it detects a focus shift (typically caused by ambient temperature changes).
- SVBony SV165 guide scope + ZWO ASI120mm mini camera - these two components together enable autoguiding. This small mono camera takes shorter exposures continuously during the session. The software identifies several stars in the guide camera image and checks for movement from the initial position. When movement is detected, the software tells the mount to move slightly to correct. This ensures accurate tracking to avoid any star distortion due to movement.
- Mele 3Q mini PC - this small computer runs Windows 11 to control the rig. All of the devices plug into the USB ports on the computer and are controlled by open source software called N.I.N.A. From N.I.N.A, I can configure a sequence of activities for the system to execute while I hang out inside.
- DeepSkyDad DC Hub - this little box is super handy for power distribution. I have one power cord that runs up to my rig and then I run cables from the hub to the mini PC, camera, and mount. The dew straps also plug in here.
- Extension Cord - I know, it’s just an extension cord, but the convenience of being able to quickly roll up the cord is a time saver.
- Baader Universal Filter Changer - this accessory sits in front of the camera and allows you to swap filters by screwing them into drawers, which slide in place.
Filters
Filters are designed to control which wavelengths of light reach your camera. I currently own three filters for various purposes:
- UV/IR cut filter - this filter is designed to block UV and IR light that can otherwise cause halos or distortion in images. My usage of this filter has been replaced by the L-Quad Enhance.
- IDAS NBZ - this is a dual narrowband filter. It blocks all but the narrow bands of wavelengths around hydrogen alpha and oxygen emissions. This is useful for blocking light pollution and allows shooting in bright moonlight. These sorts of filters are best suited for colorful nebulas.
- Optolong L-Quad Enhance - this filter is designed specifically to block light pollution, while allowing other light through. Unlike the NBZ, it is best suited for dark nebulas, galaxies, or star clusters. I use this for all of my broadband imaging at this point.
Messier 17 shot with the NBZ filter- prints available here
Lagoon and Trifid Nebulas shot with the NBZ and L-Quad- prints available here
Orion Nebula shot with the UV/IR filter- prints available here
Conclusion
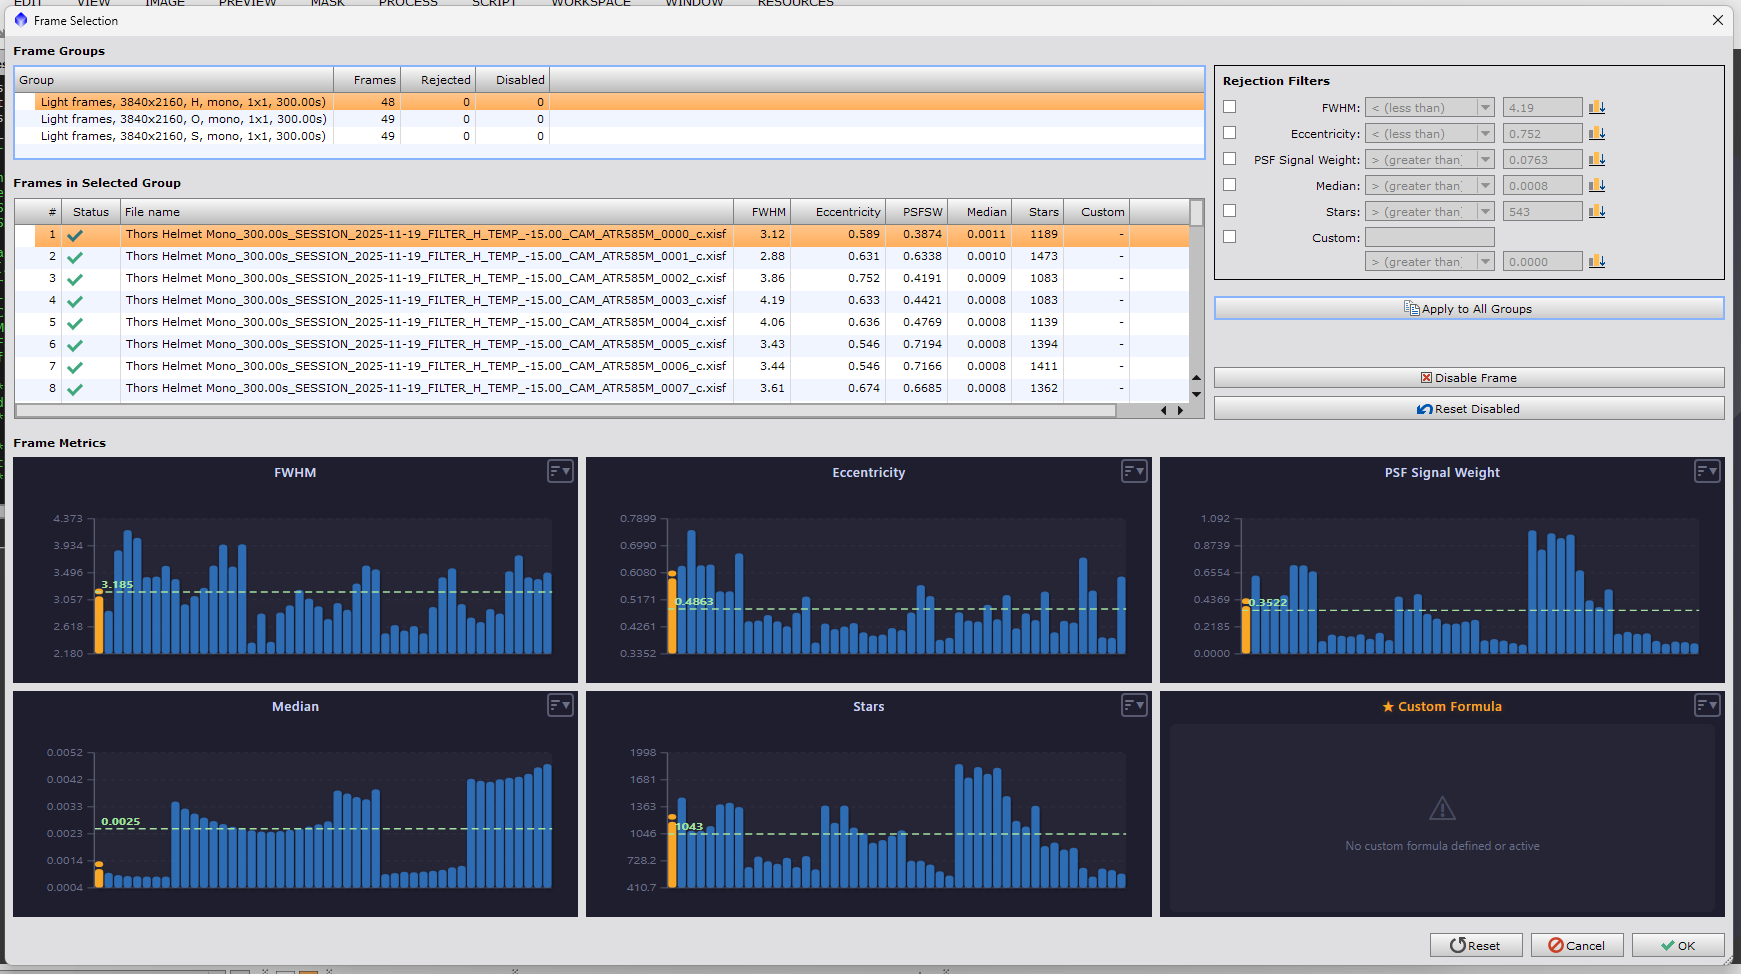
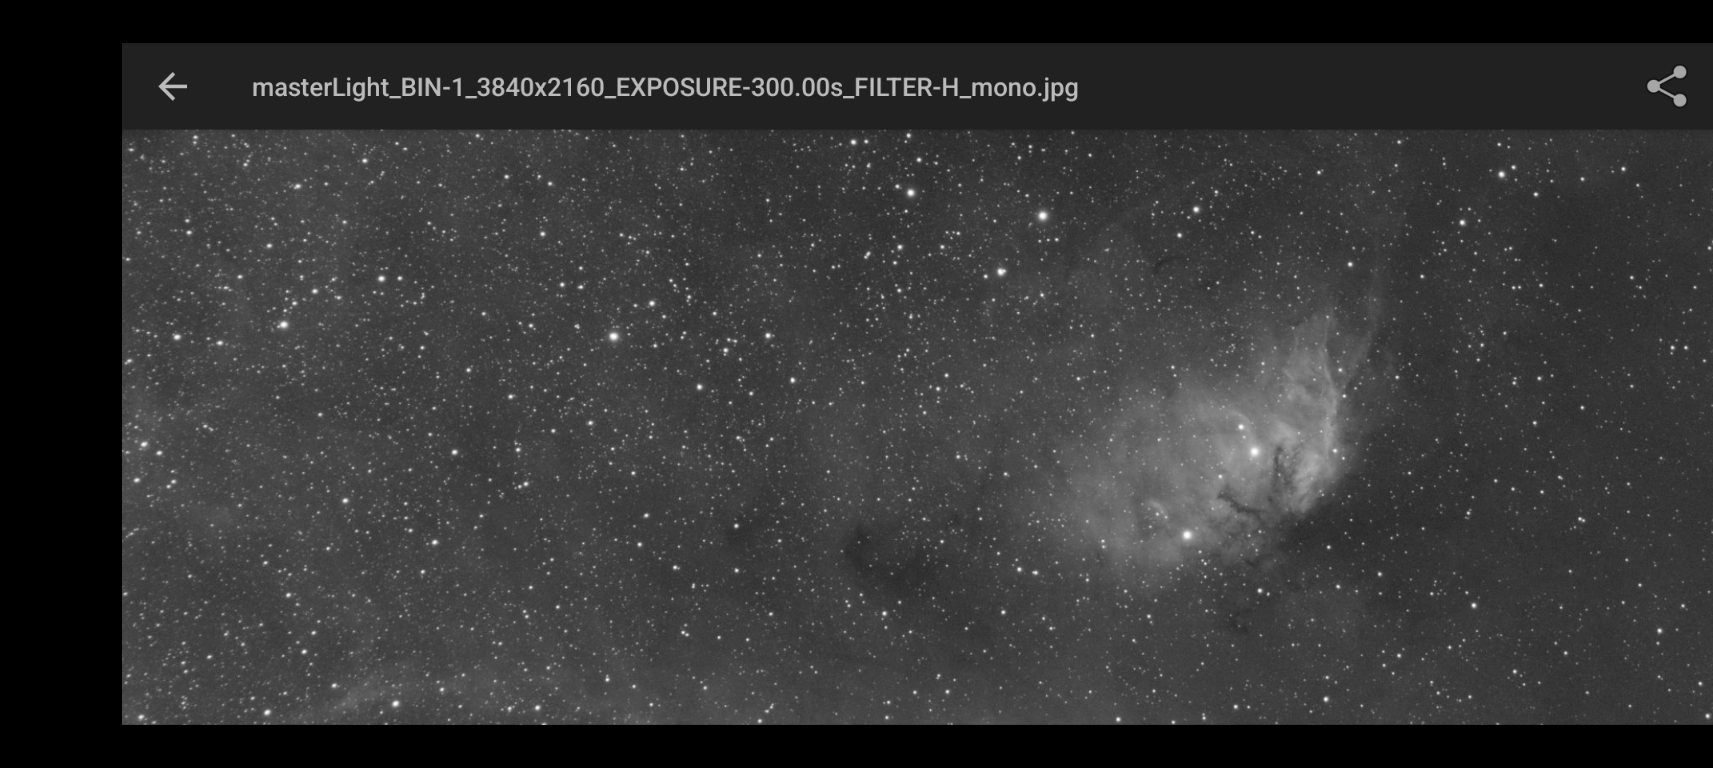
These are all the components that make up my astrophotography rig. Everything plugs into the mini PC and is controlled by N.I.N.A. Here are some details about how I run my sessions using N.I.N.A.
Share: